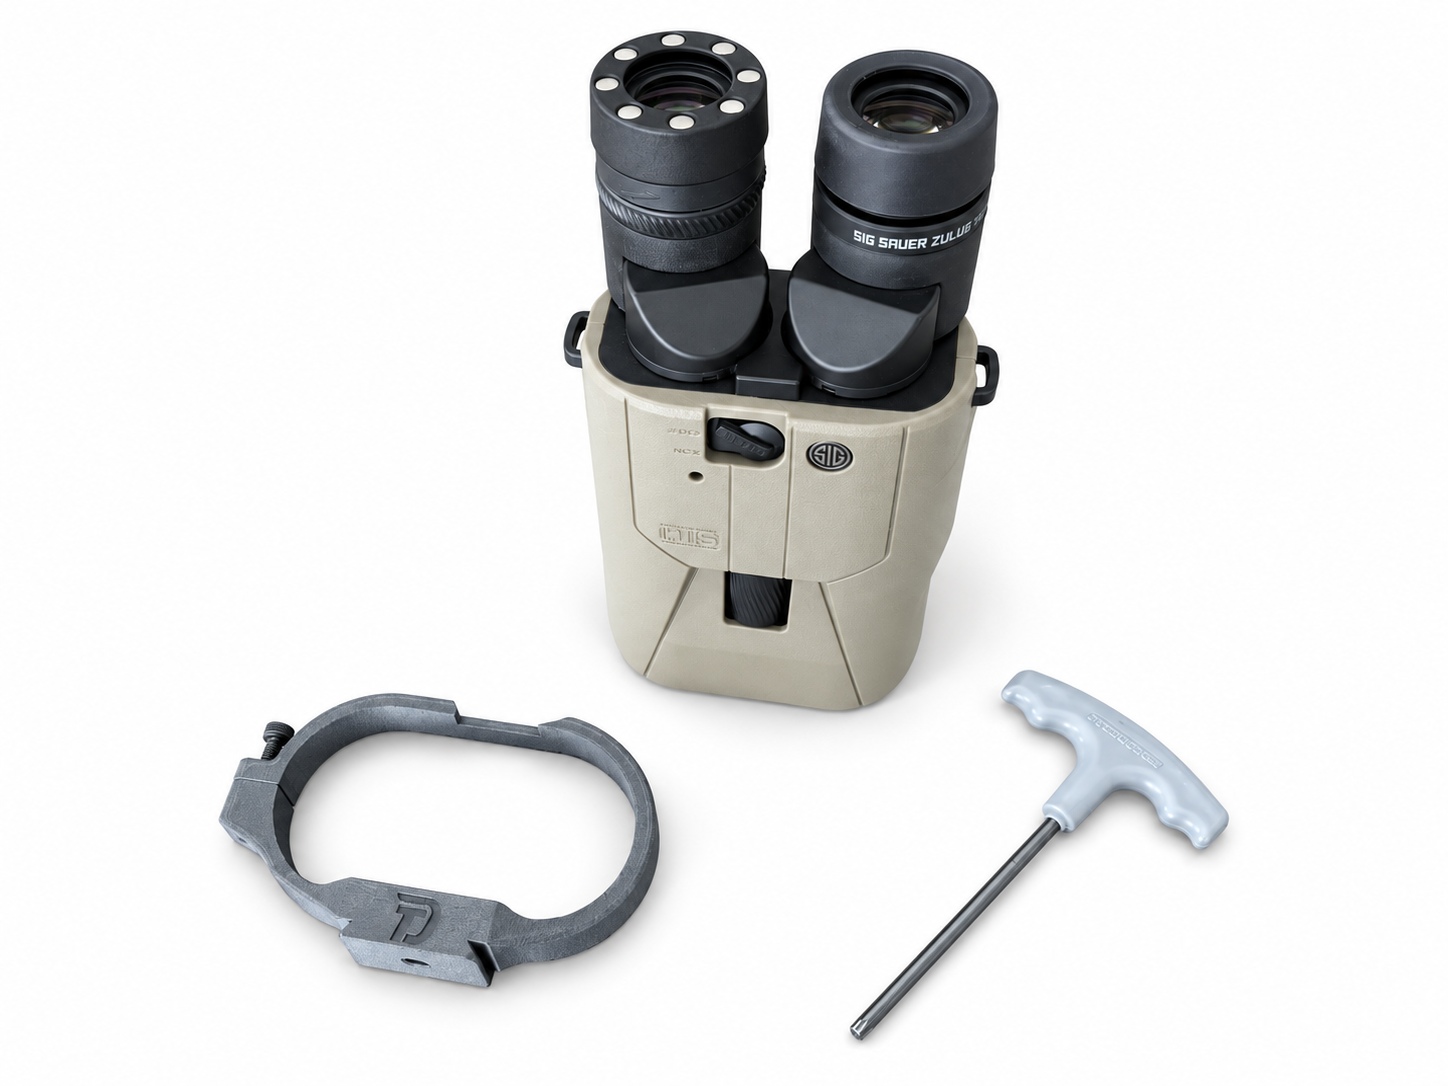
Installing the Zulu6
A quick, tool-only install. All you need is a correctly fitting hex key (not included).
Have your Zulu6 mount, M5 x 16 mm screw, and a correctly fitting hex key ready. Work on a clean, stable surface that protects the binoculars and lenses. Loosen the screw enough to allow the split side of the mount to open freely before sliding it into place. Use the accompanying photos to identify the left and right sides and the final mount orientation.
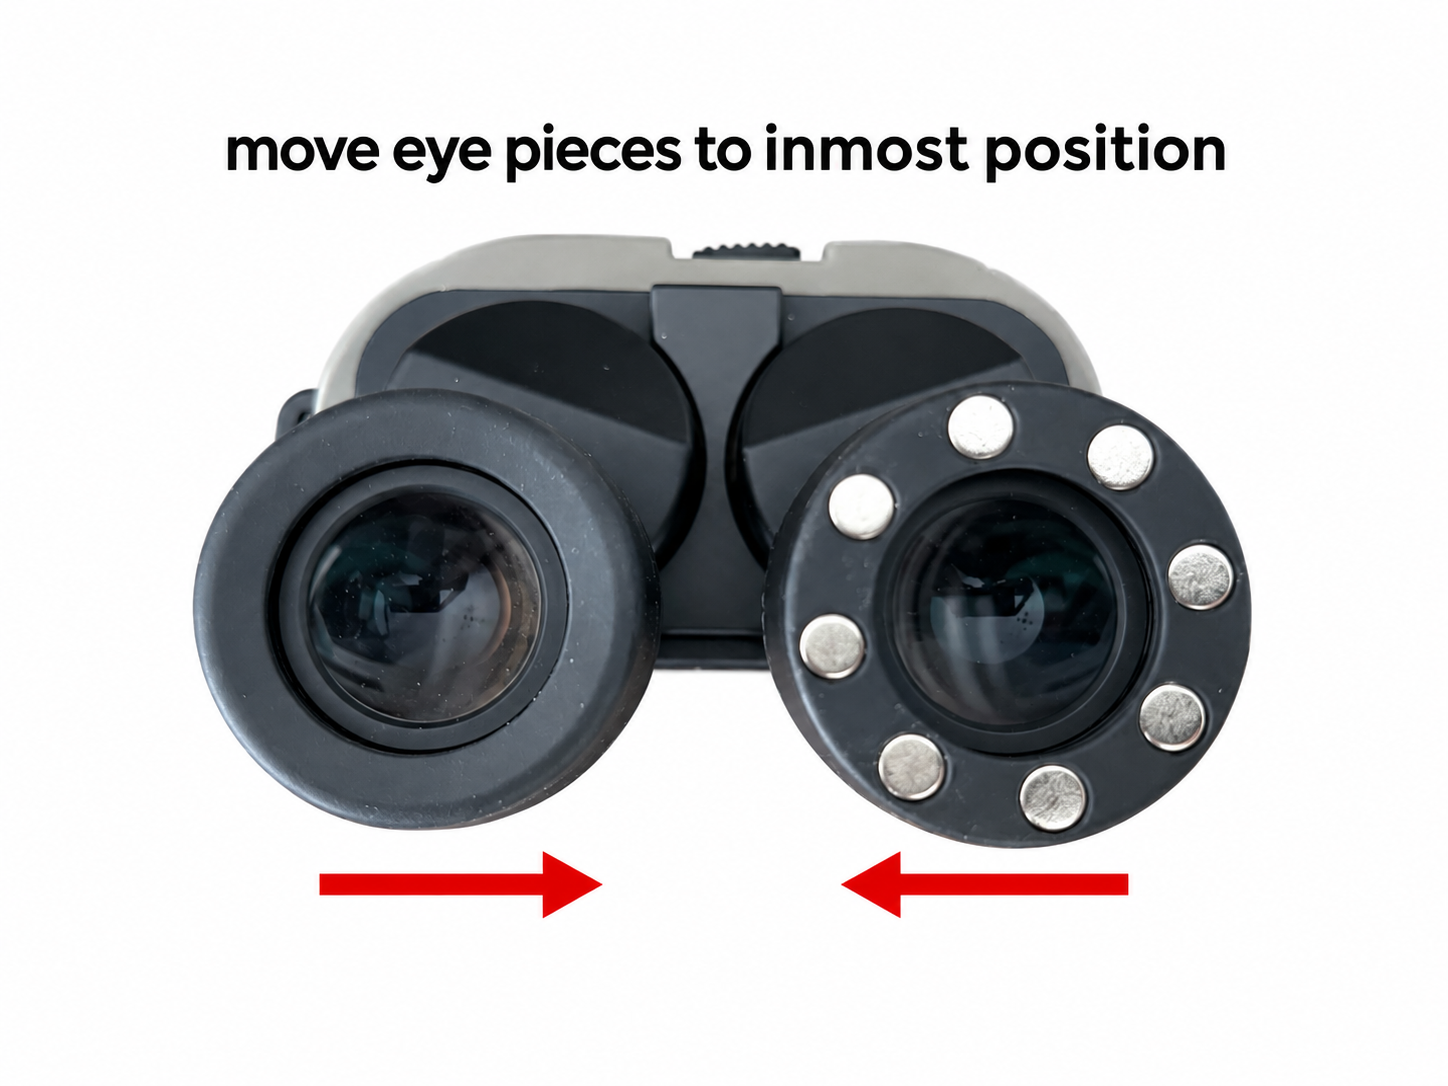
Move the eyepieces inward
Adjust the spacing between the eyepieces to their innermost position so they sit as close together as possible. This gives the mount clearance to pass over them. This step changes the spacing between the eyepieces, not the eyecup extension.
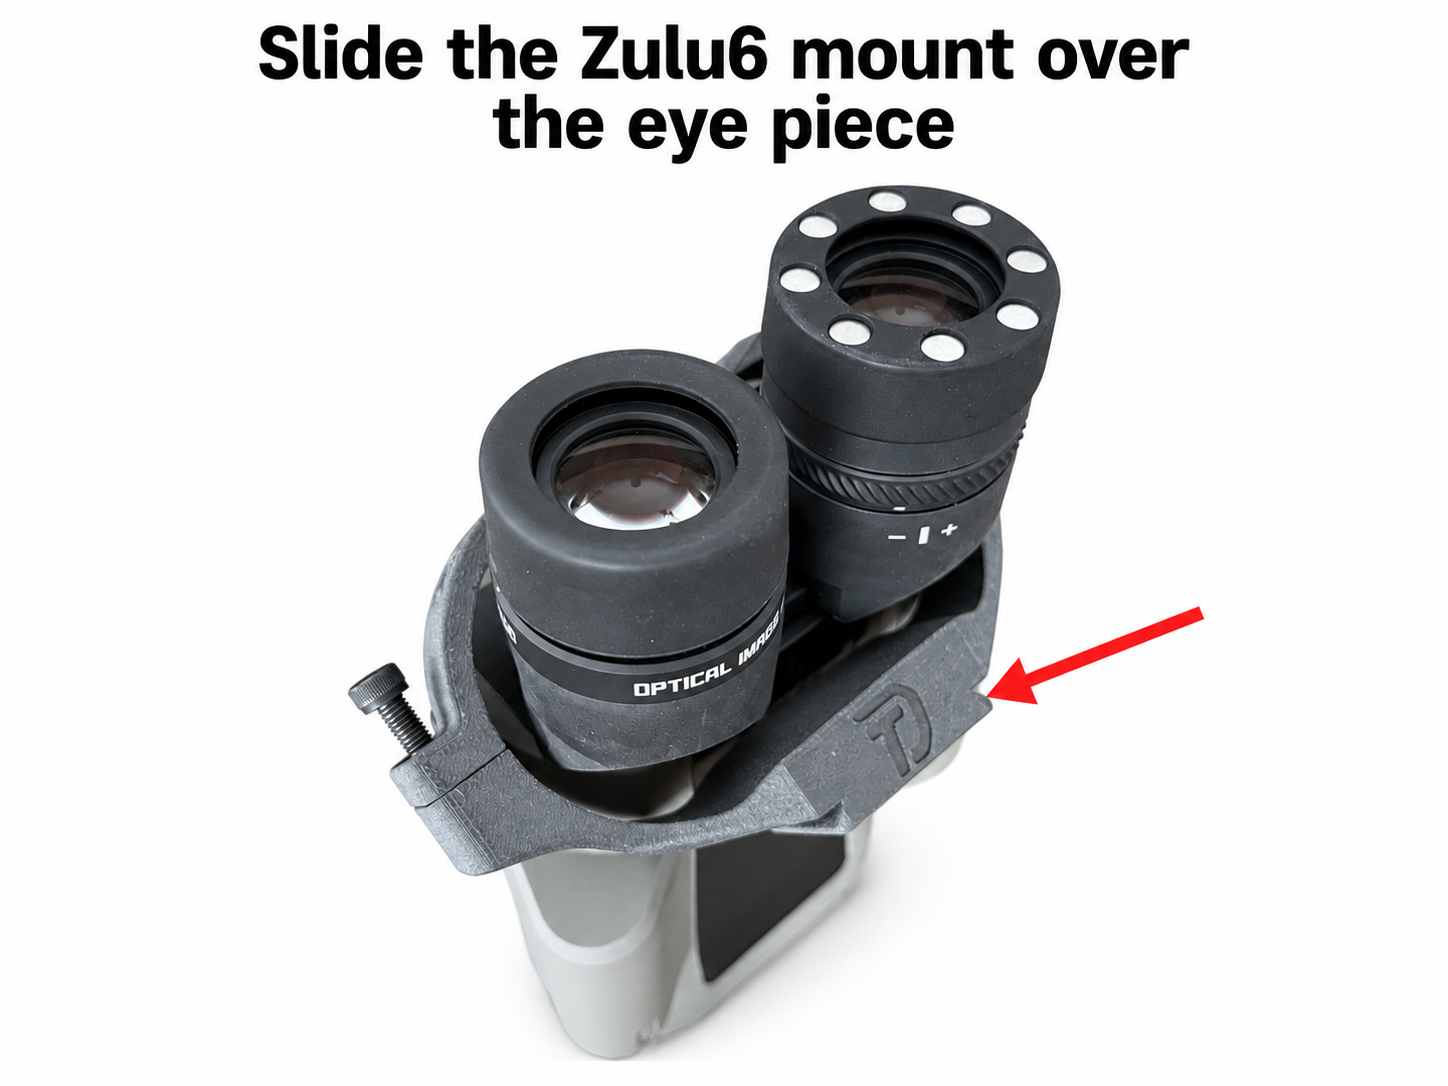
Slide the mount over the eyepieces
Orient the mount as shown in the installation photos, with the screw opening on the left side. Carefully slide it over the eyepieces toward the binocular body. Keep the screw loose. Stop when the mount reaches the lanyard mounting points; do not force it past them.
Clear the left lanyard mounting point
Slowly spread the open ends of the mount just enough to pass over the left lanyard mounting point. Gently guide the mount past the loop while supporting the binoculars.
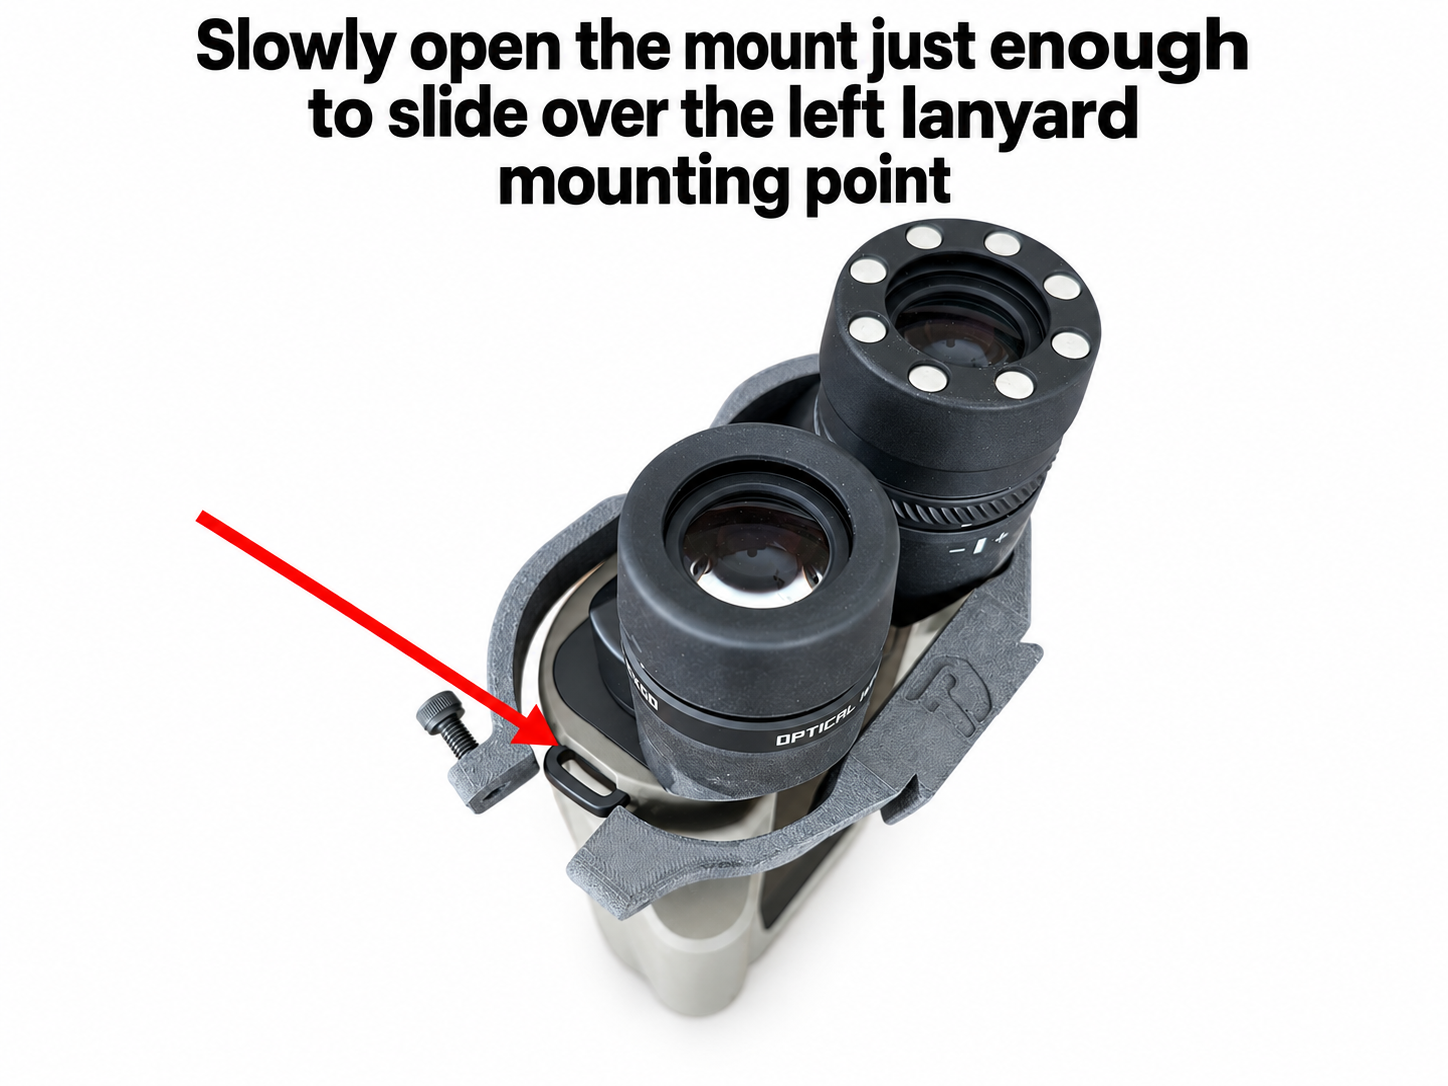
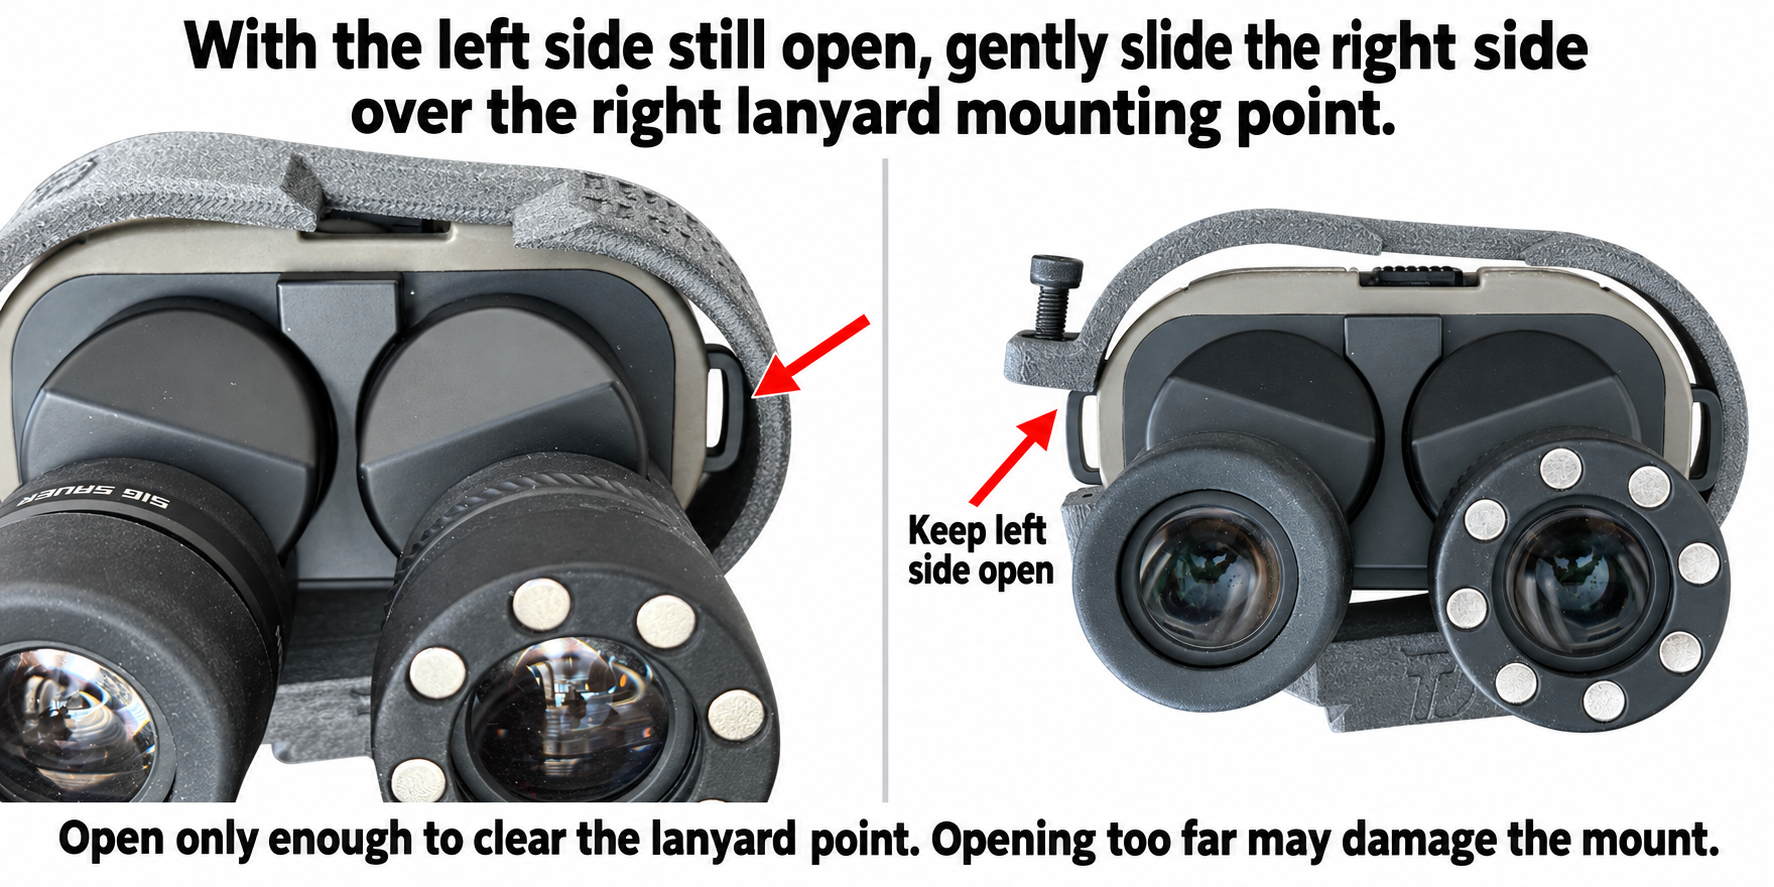
Open only as far as needed for clearance. Excessive spreading can damage the mount.
Clear the right lanyard mounting point
Keep the left side of the mount open while gently guiding the right side over the right lanyard mounting point. Work slowly and check that the mount clears the loop rather than catching on it. If it catches, stop and reposition it instead of forcing it or spreading the mount farther. Once both lanyard points are clear, allow the mount to relax around the body.
Slide into position
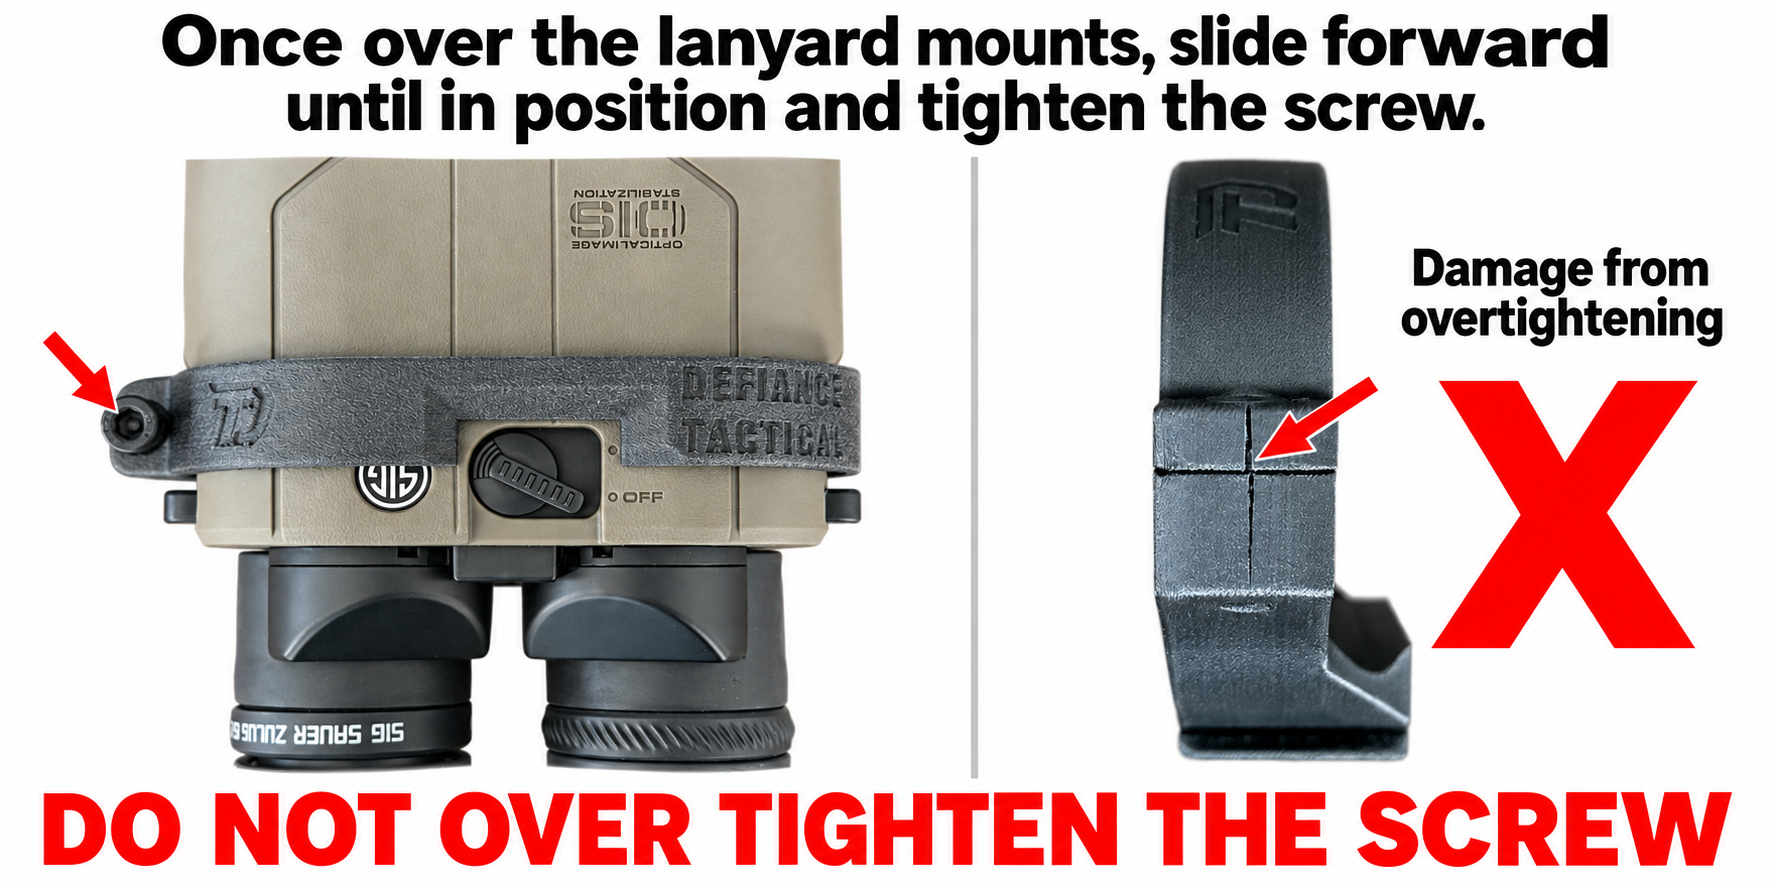
Slide the mount forward along the binocular body until it matches the final-position photo. Check that it sits evenly and that neither lanyard mounting point is trapped underneath it. Align the cutout with the control area as shown in the photo.
Tighten the M5 x 16 mm screw
With the mount properly seated, align the screw with its receiving thread. Begin threading it gently; if it resists immediately, back it out and realign it. Use a correctly fitting hex key and tighten gradually, only enough to hold the mount securely in position.
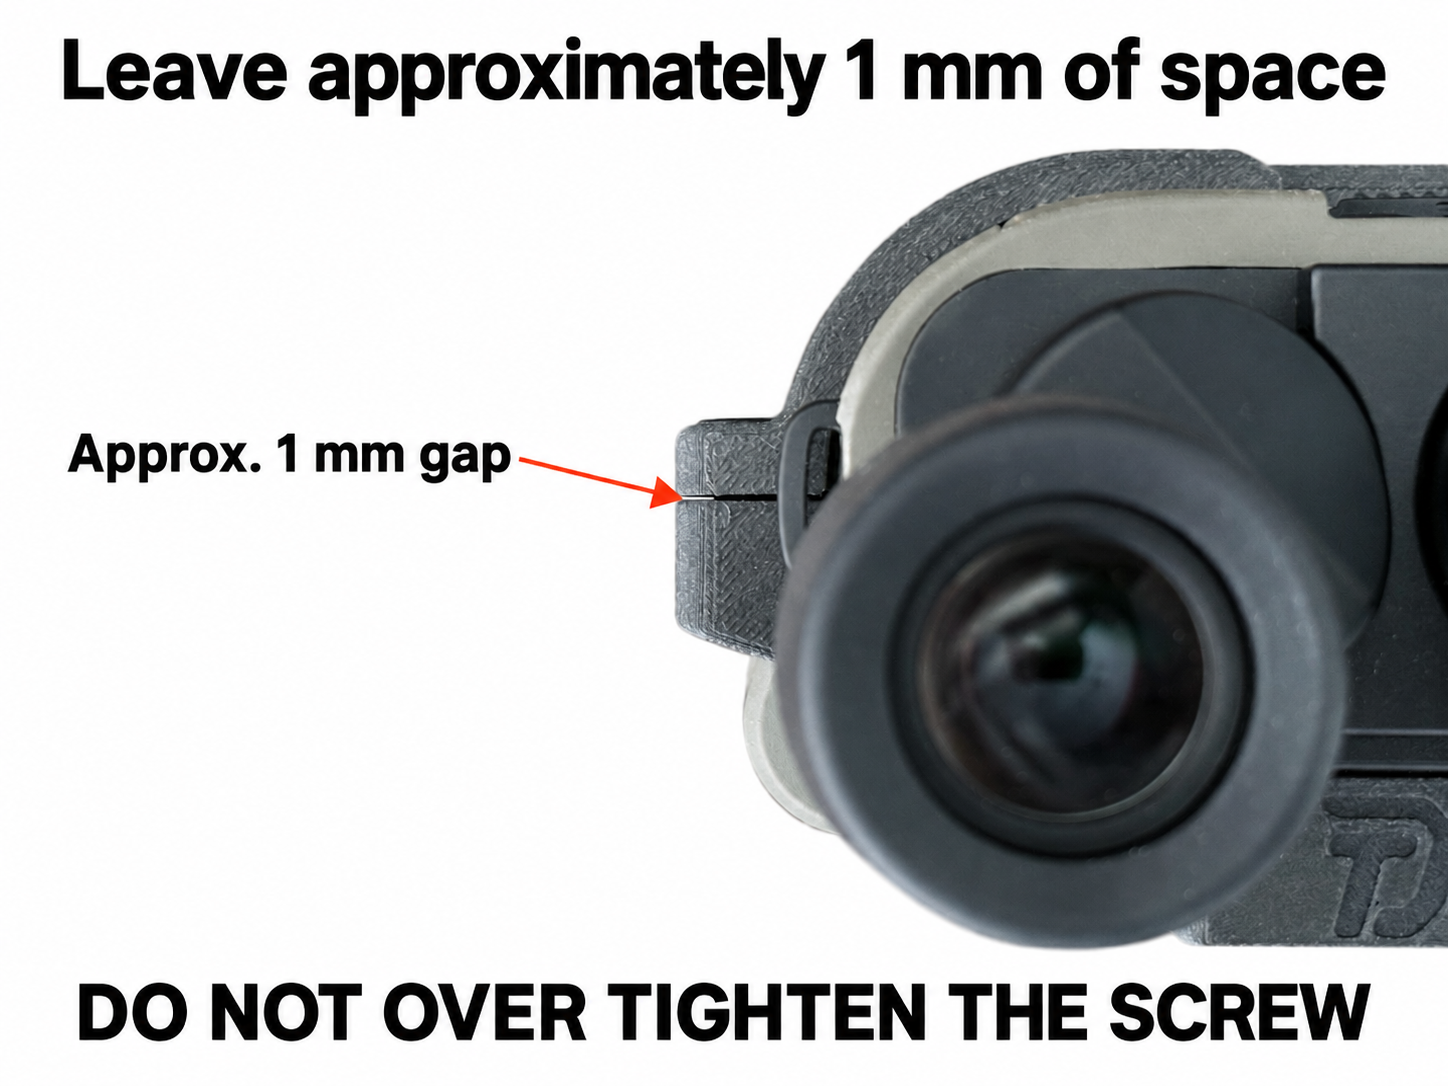
DO NOT OVER TIGHTEN THE SCREW. Overtightening can crack the mount around the screw area, as shown in the damage photo. Do not keep tightening simply to eliminate the visible gap between the clamp ends. If the mount does not hold securely with gentle tightening, stop and check its position rather than applying more force.
Check the installation and leave it in place
Gently check that the mount stays in position and that the binocular controls remain accessible. Return the eyepiece spacing to your preferred viewing position and check for interference without forcing any adjustment. The mount is intended to remain installed between uses. Routine removal and reinstallation are not part of normal use. If you notice cracking or damage, stop using the mount and contact Defiance Tactical for help.